– **Title**: Beginner’s Sourdough Bread
– **Ingredients**:
– 1 cup (240g) active sourdough starter (fed and bubbly)
– 1 1/2 cups (360ml) water, room temperature
– 4 cups (480g) all-purpose flour
– 2 tsp salt
– **Instructions**:
1. **Mix the Dough**: In a large mixing bowl, combine the active sourdough starter with the water. Stir well to dissolve the starter completely. Gradually add the all-purpose flour, mixing with a wooden spoon or your hands until no dry flour remains. The mixture will be shaggy and sticky.
2. **Autolyse**: Cover the bowl with a damp cloth or plastic wrap and let it rest for about 30 minutes. This step helps the flour absorb the water and develops gluten.
3. **Add Salt**: After the autolyse, sprinkle the salt over the dough. Wet your hands to prevent sticking and use the pinching and folding method to mix the salt into the dough. Press the dough gently until the salt is incorporated.
4. **Bulk Fermentation**: Cover the bowl and let the dough rise at room temperature for about 4 to 6 hours, or until it has doubled in size. During this time, you can perform a series of stretch and folds every 30 minutes for the first 2 hours. To do this, wet your hand, grab one side of the dough, stretch it up, and fold it over itself. Rotate the bowl and repeat until you’ve stretched all sides.
5. **Shape the Dough**: Once the dough has risen, gently turn it out onto a floured surface. Shape it into a round loaf by folding the edges towards the center and then turning it over so the seam is on the bottom. Let it rest for about 30 minutes uncovered.
6. **Final Shaping**: Lightly flour the top of the dough and flip it over. Shape it again into a round or oval loaf, depending on your preference. Place it seam-side down in a well-floured proofing basket or bowl lined with a floured kitchen towel.
7. **Second Rise**: Cover the dough with a cloth and let it rise for another 2 to 4 hours at room temperature or place it in the refrigerator overnight for a slower fermentation.
8. **Preheat the Oven**: About 30 minutes before you’re ready to bake, preheat your oven to 450°F (230°C). If you have a Dutch oven, place it in the oven to heat up.
9. **Bake the Bread**: Carefully transfer the dough onto a piece of parchment paper. Slash the top with a sharp knife or bread lame. If using a Dutch oven, remove it from the oven and lift the bread using the parchment paper, placing it inside. Cover with the lid and bake for 30 minutes. After 30 minutes, remove the lid and bake for an additional 15-20 minutes, or until golden brown.
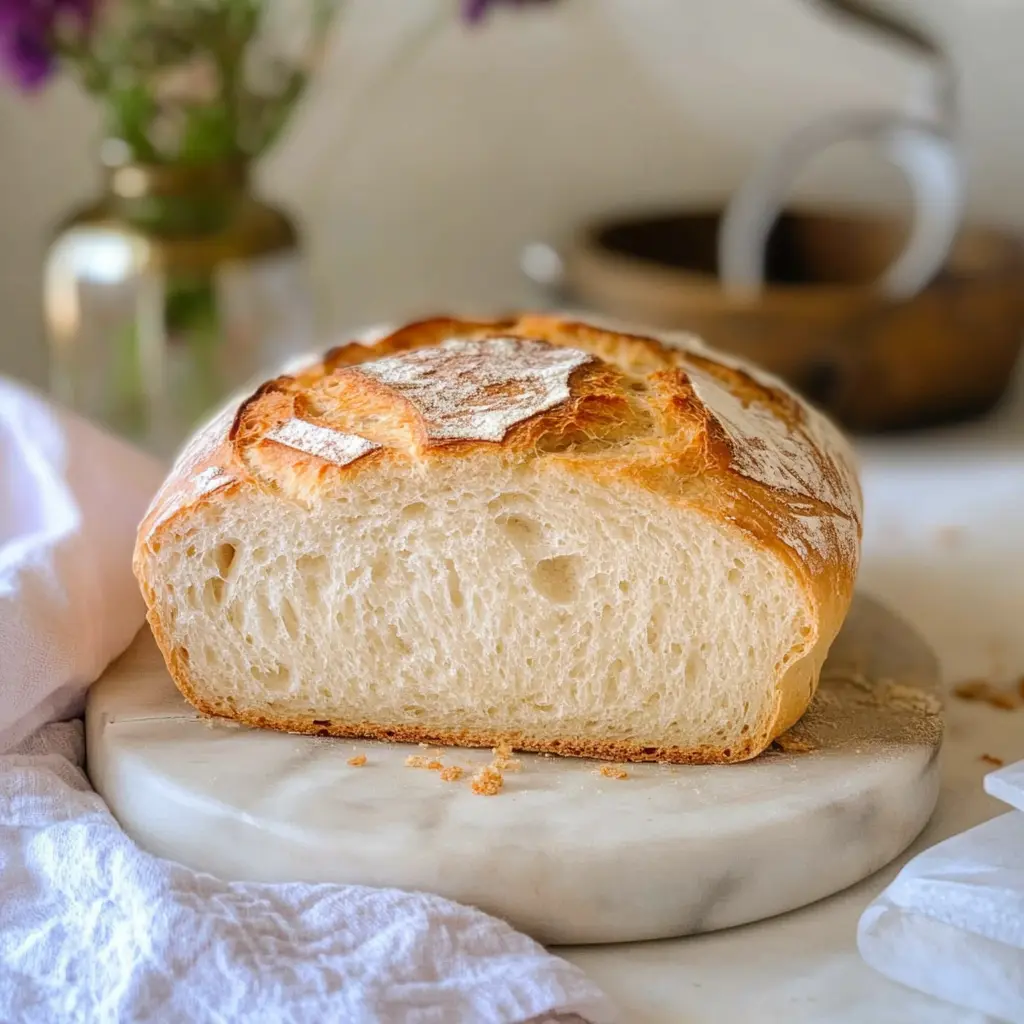
10. **Cool**: Once baked, carefully transfer the bread to a cooling rack. Allow it to cool completely before slicing to ensure the crumb sets properly.
Enjoy your homemade sourdough bread!
Key Ingredients & Substitutions
Sourdough Starter: An active, bubbly starter is key for that classic sourdough tang. If you don’t have your own, you can often find some from a friend or at a local bakery. Some stores even sell dried starters if you’re new to the process!
Water: Warm water around 100°F (38°C) helps activate the yeasts in your starter. If you’re in a cooler climate, consider using slightly warmer water. Just test it with your wrist—it should feel comfortably warm, not hot.
All-Purpose Flour: While all-purpose flour works perfectly, you could also blend in whole wheat flour for extra fiber, just keep in mind that it may alter the bread’s texture and flavor slightly. Some bakers also prefer bread flour for a chewier crust!
Salt: Salt enhances flavor and controls fermentation. You can use kosher or sea salt, but avoid table salt as it can affect the starter’s activity. Personal tip: I love using flaky sea salt for that bit of crunch!
How Do You Get That Perfect Rise with Stretch and Folds?
The stretch and fold technique is essential for building gluten structure and strength in your dough. It can feel a bit odd at first, but it’s quite simple! Here’s how to do it:
- After your autolyse rest, wet your hands to prevent sticking.
- Grab one edge of the dough, stretch it upwards, and fold it over itself.
- Rotate the bowl a quarter turn and repeat the stretching and folding until you’ve completed the full circle.
Do this gently, and you’ll notice your dough becoming more elastic. Aim for 4 sets of stretches, resting for 30 minutes between each. This method really helps your bread rise beautifully!
Beginner’s Sourdough Bread
Ingredients You’ll Need:
Key Ingredients:
- 1 cup (240g) active sourdough starter (fed and bubbly)
- 1 1/2 cups (360ml) warm water (about 100°F or 38°C)
- 4 cups (480g) all-purpose flour
- 2 teaspoons salt
How Much Time Will You Need?
This sourdough bread recipe requires about 15 minutes of active preparation time, plus resting and rising times of around 5 to 7 hours. Baking will take an additional 45 minutes. Overall, set aside a day for this wonderful homemade bread!
Step-by-Step Instructions:
1. Mixing the Dough:
In a large mixing bowl, start by combining your active sourdough starter with the warm water. Stir everything together gently until the starter is fully dissolved in the water.
2. Adding Flour:
Next, gradually add the flour into the bowl with the wet mixture. Mix it with your hands or a wooden spoon until a shaggy dough forms. It’s perfectly fine if there are some little lumps; just avoid overmixing.
3. Incorporating Salt:
Now, sprinkle the salt over the dough and mix it in using your hands. The dough will feel sticky—that’s totally normal! Just ensure that the salt is well incorporated.
4. Autolyse Phase:
Cover your bowl with a damp cloth or some plastic wrap and let the dough rest for 30 minutes. This resting phase is called “autolyse” and helps develop gluten in the dough.
5. Stretch and Fold:
After the rest period, it’s time to encourage some air into the dough! Wet your hands and grab one side of the dough, gently stretch it up, and fold it over itself. Turn the bowl a quarter of the way and repeat this stretching process all the way around (about 4 times).
6. The Rise:
Cover the bowl again and let the dough rise at room temperature for 4 to 6 hours, or until it has easily doubled in size. If it’s warm in your kitchen, it may rise even quicker!
7. Shaping the Dough:
When the dough has risen, lightly flour a clean surface and turn the dough out onto it. Shape it into a round loaf by tucking the edges into the center and rolling it gently until it looks smooth.
8. Proofing the Loaf:
Now, place your shaped dough seam-side down into a well-floured proofing basket or bowl. Cover it and let it rest again for 1 to 2 hours until it puffs up nicely.
9. Preheating the Oven:
About 30 minutes before you’re ready to bake, preheat your oven to 450°F (232°C) and place a Dutch oven (with its lid) inside to heat up. This helps create a lovely crust on your bread.
10. Transferring to the Dutch Oven:
Once preheated, take the Dutch oven out of the oven carefully. Flip your proofed dough onto a piece of parchment paper (seam-side up) and then transfer it into the hot Dutch oven. You can optionally score the top of the loaf with a sharp knife or razor blade for a nice decorative touch.
11. Baking the Bread:
Cover the Dutch oven with its lid and bake for 30 minutes. After that, remove the lid and bake for another 15 to 20 minutes until the bread is golden brown and sounds hollow when tapped on the bottom.
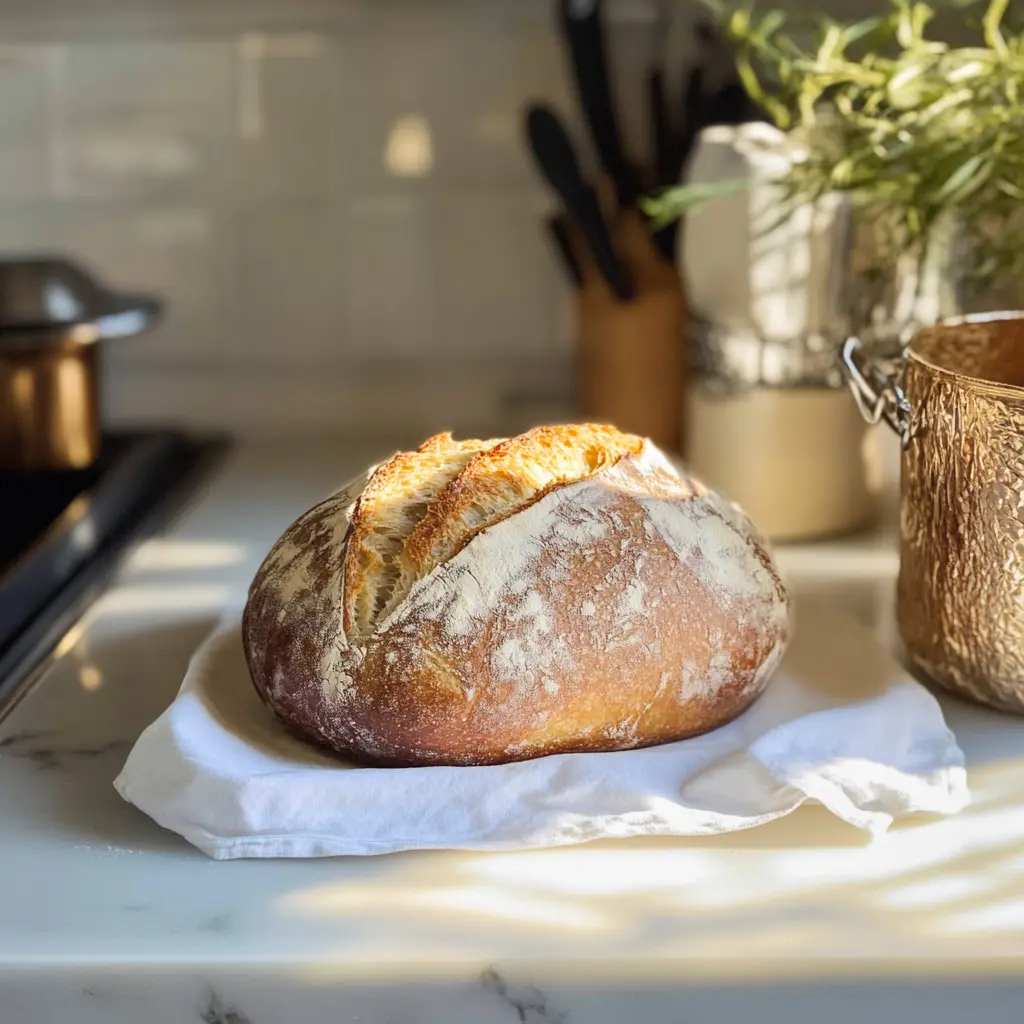
12. Cooling Down:
Once baked, carefully take the bread out of the Dutch oven and place it on a wire rack. Let it cool for at least 30 minutes before slicing. Enjoy the delicious aroma and flavor of your homemade sourdough bread!
### FAQ for Beginner’s Sourdough Bread
Can I Use a Different Type of Flour?
Yes, you can substitute some all-purpose flour with whole wheat flour or bread flour for a different flavor and texture. Just note that whole wheat flour may absorb more water, so you might need to add a bit more water to the dough to achieve the right consistency.
What Should I Do If My Dough Isn’t Rising?
If your dough isn’t rising, it could be due to a few factors, such as a weak starter or too cool of a temperature. Ensure your sourdough starter is active and bubbly before using it. If your kitchen is cold, try placing the dough in a warmer spot, like on top of the fridge or near a warm oven, to encourage fermentation.
Can I Make This Recipe Gluten-Free?
Yes, you can make sourdough with gluten-free flour blends. Look for a blend designed for bread-making as it will have the appropriate starches and flours for structure. You may need to adjust the hydration slightly, adding more water if the dough appears too dry.
How Do I Store Leftover Bread?
Store any leftover sourdough bread in a paper bag at room temperature for up to 2 days, or wrap it tightly in plastic wrap and freeze it for longer storage. To reheat, simply place it in a preheated oven at 350°F (175°C) for about 10-15 minutes to revive the crust before serving.