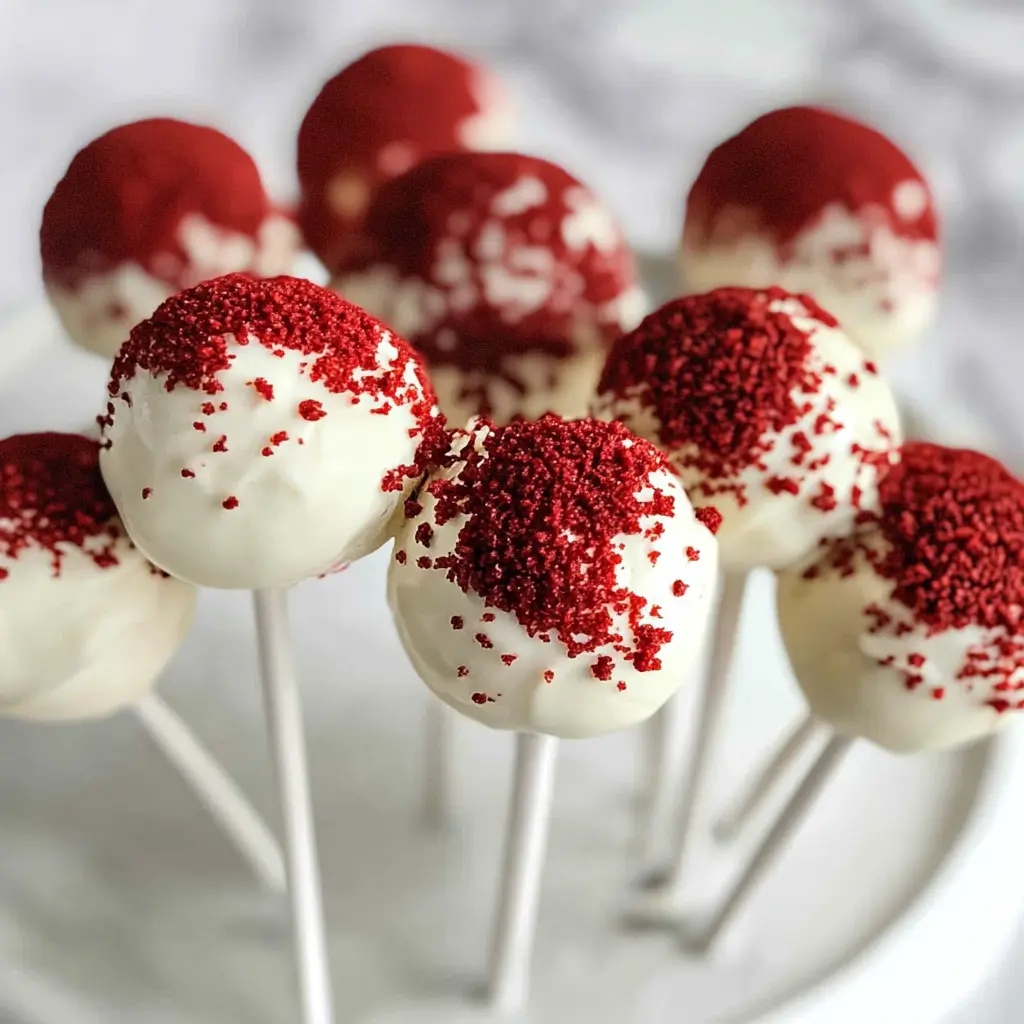
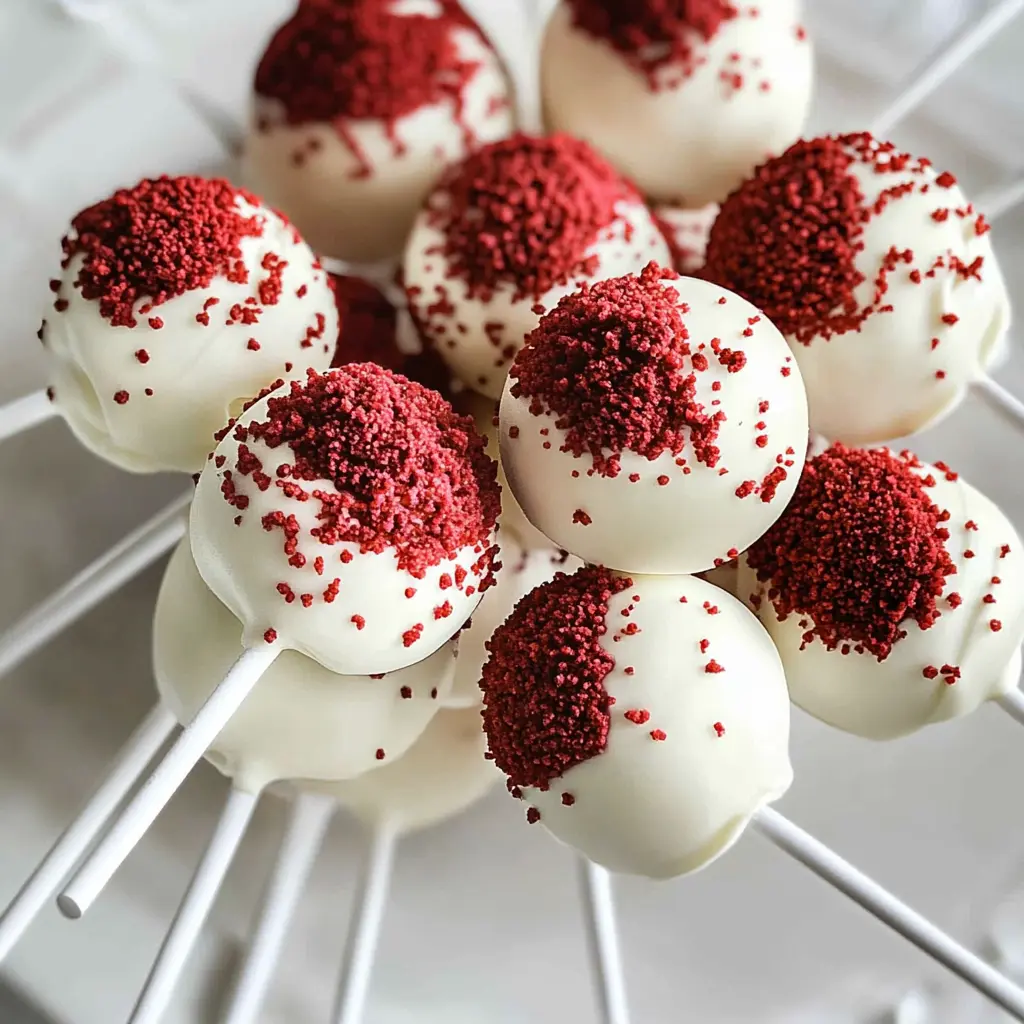
– **Title**: Red Velvet Cake Pops
– **Ingredients**:
– 1 box red velvet cake mix (plus ingredients required on the box, typically eggs, oil, and water)
– 1 can cream cheese frosting (16 oz)
– 8 oz white chocolate or candy melts for coating
– Sprinkles or additional decorations (optional)
– Lollipop sticks
– **Instructions**:
1. **Bake the Cake**: Prepare the red velvet cake as per the box instructions. Bake it in a 9×13 inch pan and allow it to cool completely.
2. **Crumble the Cake**: Once the cake is cool, crumble it into a large mixing bowl until fine crumbs form.
3. **Mix with Frosting**: Add the cream cheese frosting to the cake crumbs. Use your hands or a spatula to mix until well combined; the mixture should hold together when pressed.
4. **Form the Balls**: Scoop out small amounts of the mixture (about 1-2 tablespoons) and roll them into balls. Place the balls on a baking sheet lined with parchment paper. Once formed, refrigerate them for about 30 minutes to firm up.
5. **Prepare the Coating**: While the cake pops are chilling, melt the white chocolate or candy melts in a microwave-safe bowl. Heat in 30-second intervals, stirring in between, until fully melted and smooth.
6. **Insert Sticks**: Remove the cake balls from the refrigerator. Dip the end of each lollipop stick into the melted chocolate and then insert it into the center of a cake ball. This helps to secure the stick.
7. **Coat the Pops**: Dip each cake pop into the melted chocolate, ensuring it’s completely covered. You may need to gently tap it on the side of the bowl to remove excess chocolate.
8. **Add Decorations**: Before the coating sets, add any sprinkles or decorations as desired.
9. **Let Set**: Place the coated cake pops in a foam block or stand to allow them to dry completely. This should take about 15-30 minutes depending on your environment.
10. **Serve and Enjoy**: Once set, your red velvet cake pops are ready to serve! They can be stored in an airtight container for a few days or frozen for later enjoyment.
Enjoy your delightful, festive red velvet cake pops!
Key Ingredients & Substitutions
Red Velvet Cake Mix: A box mix simplifies the process! If you’re interested, you can make your own from scratch using cocoa powder, flour, sugar, and buttermilk. This way, you can control the ingredients and flavor.
Cream Cheese: Softened cream cheese adds richness. If you’re looking for a lighter option, try using Greek yogurt or mascarpone cheese. Just keep in mind that the texture will change slightly.
White Chocolate: I love using high-quality white chocolate for a creamy finish. If you prefer, candy melts are easier to work with and come in various colors. They set well and are great for decorating.
Lollipop Sticks: Wooden lollipop sticks are perfect for cake pops. If you can’t find them, thin pretzel sticks work as a fun alternative!
How Do I Get My Cake Pops to Hold Their Shape?
Forming cake pops that stay round and don’t fall apart relies on two key steps. First, ensure your cake is completely cooled before crumbling.
- Mix the crumbled cake with the cream cheese mixture just until it’s combined. Too much mixing can make it gooey.
- Chilling the formed balls for at least 30 minutes helps them firm up. This step is crucial!
How to Make Red Velvet Cake Pops
Ingredients You’ll Need:
For the Cake:
- 1 box red velvet cake mix
- 3 large eggs
- 1 cup vegetable oil
- 1 cup water
For the Cream Cheese Mixture:
- 8 oz cream cheese, softened
- 1/2 cup powdered sugar
- 1 tsp vanilla extract
For Coating and Serving:
- 12 oz white chocolate, chopped or candy melts
- Lollipop sticks
- Red velvet cake crumbs (optional, for garnish)
How Much Time Will You Need?
You’ll spend about 45 minutes preparing the cake pops, including baking, cooling, and mixing. After that, allow about 30 minutes for the cake pops to chill in the freezer before coating them with chocolate. So altogether, it’s a fun and tasty project that takes roughly 1 hour and 15 minutes!
Step-by-Step Instructions:
1. Bake the Cake:
Start by preheating your oven to 350°F (175°C). Grease and flour two 9-inch round cake pans to prevent sticking. In a large bowl, prepare the red velvet cake mix according to the package instructions, adding the eggs, vegetable oil, and water. Once mixed well, divide the batter evenly into the two prepared pans.
2. Cool the Cake:
Bake your cake in the preheated oven for 25-30 minutes. To check for doneness, insert a toothpick into the center; if it comes out clean, the cake is ready! Let the cakes cool in the pans for about 10 minutes before carefully transferring them to a wire rack to cool completely.
3. Make the Cake Crumbs:
Once your cakes have thoroughly cooled, crumble them into a large bowl with your hands or a fork. Aim for fine crumbs without any large chunks remaining.
4. Prepare the Cream Cheese Mixture:
In a separate bowl, combine the softened cream cheese, powdered sugar, and vanilla extract using a mixer or a spatula. Mix it all together until the mixture is smooth and creamy.
5. Combine the Mixtures:
Now it’s time to mix! Pour the cream cheese mixture into the bowl of crumbled cake and stir until everything is well blended. The mixture should be moist and easily shapeable into balls.
6. Form Balls:
With clean hands, grab a small amount of the mixture and roll it into a ball about 1 inch in diameter. Place the balls on a lined baking sheet. Once you’ve formed all the balls, freeze them for about 30 minutes to help them firm up.
7. Melt the Chocolate:
While the cake pops are chilling, melt your white chocolate or candy melts. Use a microwave-safe bowl and heat the chocolate in 30-second intervals, stirring each time until melted and smooth.
8. Insert Lollipop Sticks:
To help the sticks stick better, dip the end of each lollipop stick into the melted chocolate before inserting it into the center of each cake ball. Repeat this for all the cake pops.
9. Coat the Cake Pops:
Next, dip each cake pop into the melted chocolate, making sure it’s fully coated. Let any excess chocolate drip off. If you want, roll the coated pops in red velvet cake crumbs for a decorative touch.
10. Set the Cake Pops:
Place the finished cake pops into a styrofoam block or a stand to allow the chocolate to set. You can leave them at room temperature to harden or place them in the refrigerator for a quicker set.
11. Serve and Enjoy:
Once the chocolate is hardened, your delicious red velvet cake pops are ready to serve! They’re perfect for parties or as a delightful treat. If you have leftovers, store them in an airtight container in the fridge.
Enjoy making these tasty treats, and share them with your friends and family!
Can I Use a Different Cake Mix?
Absolutely! You can substitute the red velvet cake mix with any other flavored cake mix you like, such as chocolate or vanilla. Just keep in mind that the flavor and color will change. The method for preparing the pops remains the same!
How Can I Store the Cake Pops Properly?
To keep your cake pops fresh, store them in an airtight container in the refrigerator for up to a week. If you’re concerned about them sticking together, you can lightly separate layers with parchment paper.
What If My Cake Mixture Is Too Dry?
If your cake mixture feels too dry and crumbly, you can add a little more softened cream cheese or a splash of milk to make it more moldable. Just be careful not to add too much at once!
Can I Use Dark or Milk Chocolate Instead of White Chocolate?
Yes, you can! Dark or milk chocolate can be used for coating the cake pops. Just keep in mind that the flavor profile will change, and you may want to adjust the sweetness accordingly. Melt and coat the pops in the same way as with white chocolate.